
Looking to service your V10 4 Stroke Mercury Outboard? This kit includes your parts and oil (all genuine).
Jump to the 100-Hour / Annual Maintenance Schedule
Oil included in base kit
3x 8M0078630 3.78L Mercury 25W-40 Synthetic blend engine oil (for 350, 400, and SeaPro Models) (if you have a racing model please contact us to change the oil type)
2x 8M0078015 946mL Mercury racing gear oil 85W-90 (Important for the 6.4" Gearcase: - counter rotating V10 outboards require a measured fill of 2.2L or confirmed fill with the gearcase 7 degrees from horizontal. Standard rotation engines require 1.58L).
Parts included in base kit
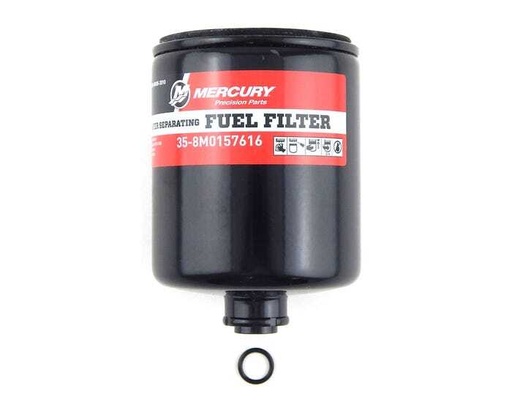
Oil filter (35 8M0205848)
Impeller repair kit (8M0200136)
includes yellow gear lube washers, impeller, wear plate, lower cover and seals
Options available to add on
If you require any of the following extras, please select the options you require using the checkboxes near the add to cart button.
|
|

|
|
|
|
|
|

|
|
|
|
The sections below provide the Authoritative Mercury V10 inspection & maintenance schedule and step-by-step procedures.
V10 Verado / SeaPro — Quick Specifications
Charging & Starting
| Item | Spec |
|---|---|
| Alternator output (12 V) | 85–150 A (regulated) |
| Regulator setpoint | Variable (LIN-controlled) |
| Alternator output (48 V) | 31 A @ 3500 RPM · 107 A @ 6000 RPM · 56 V nominal |
| Starter current draw | 200–280 A (under load @ 23 °C) · 75–125 A (no load @ 12 VDC) |
Battery Requirements (AGM)
| Region | Minimum Starting Battery |
|---|---|
| USA (SAE) | ≥1000 MCA & RC ≥100 min (cranking-only) · With house battery: RC ≥135 min |
| International (EN) | ≥800 CCA & ≥65 Ah |
Fuel System Specifications
| Item | Spec |
|---|---|
| Fuel octane | 87 AKI (U.S. “(R+M)/2”) ≈ 91 RON (Australia: 91 RON ULP) |
| Fuel pressure (idle) | 290–340 kPa (42.1–43.9 psi) |
| Fuel pressure (engine off) | 340–370 kPa (49.3–53.7 psi) |
| Filtration | Remote: 10 μm · Engine inlet: 46 μm · High-pressure rail inlet: 46 μm |
| Fuel pump draw | 12 A ± 2 A @ 14.4 V |
| Max inlet vacuum | 11.5 kPa (3.4 in Hg) |
Cooling Performance (water pressure)
| Engine Speed | Water Pressure |
|---|---|
| Idle, hot (~650 RPM) | 0–5 kPa (0.0–0.7 psi) |
| WOT (~6400 RPM) | 35–260 kPa (5.1–37.7 psi) |
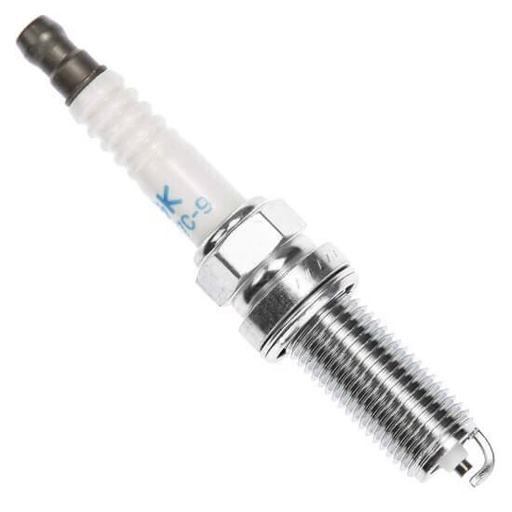
Ignition — Spark Plug
| Item | Spec |
|---|---|
| Type | NGK LKAR7C-9 |
| Gap | 0.9 mm (0.035 in) |
| Torque | 20 N·m (177 lb-in) |
Inspection & Maintenance Schedule (Authoritative)
Before each use
- Check engine oil level.
- Confirm stop-switch lanyard stops the engine.
- Inspect fuel lines for leaks.
- Inspect tightness on transom.
- Check propeller for damage.
- Inspect hydraulic steering fittings/hoses and steering system for binding/looseness (if equipped).
- Inspect power-steering fluid level (if equipped).
After each use
- Flush the cooling system after salt/polluted/muddy operation.
- If in saltwater: wash off deposits and flush exhaust outlet and gearcase; inspect powerhead for salt buildup.
Every 50 hours (extreme-duty use)
- Change engine oil & filter.
- Change gear lube on Sport Master gearcases.
- Note for 48 V alternator models: oil interval is based on total run hours (charging + propulsion).
Every 100 hours or annually (whichever first)
- Change engine oil & filter.
- Change gearcase lubricant.
- Inspect corrosion-control anodes.
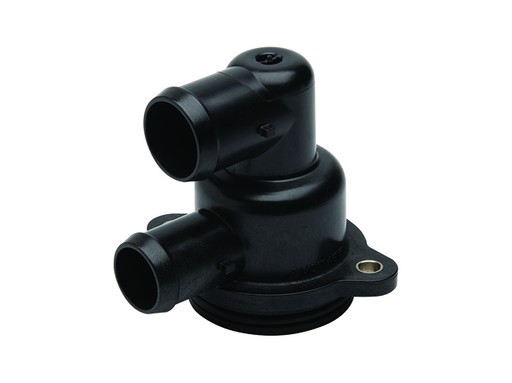
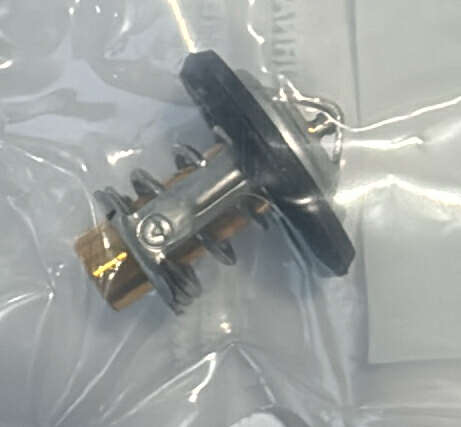
- Visually inspect main thermostat (dealer) for closing at room temp.
- Remove & inspect spark plugs; apply anti-seize to threads (saltwater); replace as necessary (dealer).
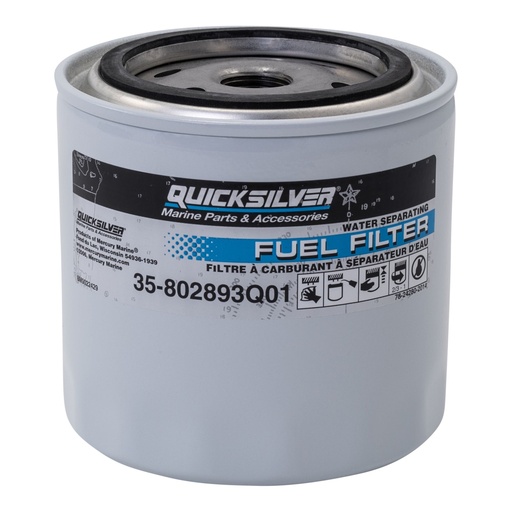
- Check boat-mounted water-separating fuel filter for water/contaminants; drain or replace.
- Inspect/clean inline fuel filter (first 100 h; dealer).
- Inspect cooling-system water strainer (dealer).
- Remove propeller & lubricate prop-shaft.
- Inspect transom tightness.
- Inspect starting battery; inspect battery cables & clean-power harness.
- Check fastener tightness (dealer) and add Quickleen to tank.
- Plus intake/cowl checks (seals, intake silencer, idle muffler, clamps/boots).
Every 300 hours or 3 years (whichever first)
- Replace spark plugs (dealer).
- Replace boat-mounted water-separating fuel filter.
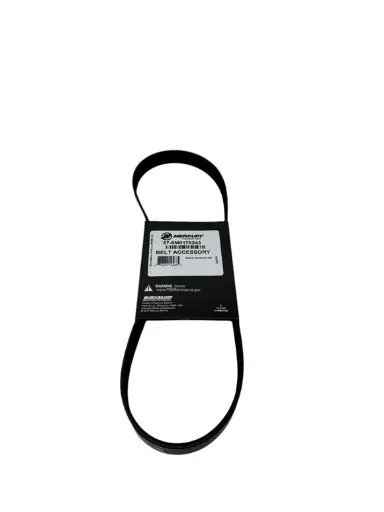
- Replace accessory drive belt (dealer; 48 V alternator models follow total run-hour guidance).
- Replace water-pump impeller (dealer); sooner if low pressure/overheating, annually in Australia/South Pacific.
- Inspect crankcase-cooler thermostat function (dealer).
- Check power-trim fluid level.
- Lubricate upper driveshaft splines (dealer).
- Check wiring/connectors (dealer).
Every 1000 hours
- SeaPro: check valve lash (dealer).
Service Procedures (step-by-step)
Change Engine Oil & Filter
Capacity
On Land
- Tilt outboard up past vertical for ~1 min to drain oil back to sump; return to vertical.
- Loosen oil-drain valve with 16 mm (5/8 in) wrench until it turns by hand (do not open yet).
- Attach 12 mm (7/16 in) I.D. drain hose and route to a container (> 9.5 L).
- Open the valve exactly up to 2-1/2 turns and drain oil.
- Hand-tighten valve, remove hose; torque valve to 15 N·m; clean area.
- Fill with specified oil (see your kit); then follow “Check oil level” below.
On Water (with crankcase oil pump)
- Tilt up ~1 min; return to vertical.
- Open service access door, remove dipstick.
- Attach oil-drain hose to crankcase oil pump (P/N 802889A1) and hose P/N 8M0129230; route drain tube to container (> 9.5 L).
- Extract oil; let hose drain, then remove pump and reinstall dipstick fully.
- Add oil per capacity; proceed to filter change.
Filter Change
- Remove plug from the oil trough; attach 12 mm (7/16 in) hose and route to container.
- Remove old filter with wrench (91-889277) and allow trough to drain; clean trough & base.
- Remove hose and reinstall plug.
- Do not use grease on the filter gasket. Lightly oil gasket; spin filter on until gasket contacts base, then tighten 2/3–1 turn.
Check Oil Level
- After running a few minutes, shut down and wait ≥ 1 hour.
- With engine vertical for several minutes, remove/wipe/reinsert dipstick fully, then read.
- If below ADD or not visible, add **3.3 L (3.5 qt)**, recheck; target is ~½–⅔ up the cross-hatch.
Boat-Mounted Water-Separating Fuel Filter (with WIF sensor)
Removal
- Key OFF; lanyard safe. Shut off fuel supply.
- Disconnect WIF sensor harness; spin filter off; drain into approved container.
- Remove rubber boot; unscrew WIF sensor and retain.
Installation
- Remove plug from new filter.
- Lubricate WIF-sensor O-ring; install sensor and tighten to 2.5 N·m (22 lb-in). Refit boot.
- Lightly oil filter O-ring. Spin on until gasket contacts base, then tighten 2/3–1 turn.
- Reconnect WIF harness. Prime fuel system (next section) and check carefully for leaks.
Inline Fuel Filter (engine inlet)
- Remove fuel-inlet hose from engine fitting; withdraw inline screen filter.
- Clean debris; replace only if damaged.
- Reinsert filter; reinstall hose.
Prime / Fill the Fuel System
- Key to RUN for ~6 s to cycle pumps; start and allow engine to purge air. (May run rough briefly.)
- If the remote filter is far from the engine, slightly increasing throttle while running purges faster.
Flush Cooling System
Single-Engine Flush
- Engine OFF; outboard vertical or tilted.
- Remove flush connector cover (port-side bottom cowl) and thread garden hose.
- Open tap ~½ turn; flush for ~15 min; shut tap, disconnect hose, refit cover.
Multi-Engine Flush (automatic system)
- Engines OFF; position outboards.
- Thread hose into flush quick-connector (5/8″ recommended) and connect at transom flush port.
- Open water, then press the system’s start button (or remote button if equipped).
- When cycle completes, shut water and remove hose.
Gearcase Lubricant — Drain / Fill
- With engine vertical, remove fill/drain plug and sealing washer at the bottom, then remove the lubricant-level plug.
- Using a pump, fill through the lower (fill/drain) hole until lubricant flows from the level hole without air bubbles. V10 gearcase require a measured fill which may require outboard to be tilted.
- Let level stabilize a few minutes; install level plug (new washer), then remove pump and install fill/drain plug.
- Tighten both plugs to 11.3 N·m (100 lb-in). Recheck level if needed.
- Checking level later: V10 gearcase require a measured fill.
Check Power-Steering Fluid (if equipped)
- Release straps and remove steering-pump cover.
- Level should be between “MIN” and “MAX” on reservoir. Top up with Synthetic Power Steering Fluid SAE 0W-30 as needed; refit cap and cover.
Inspect Transom Tightness
- Check for movement/paint loss at brackets/fasteners/lift-plate.
- Tighten mounting locknuts/bolts to: 75 N·m (55 lb-ft) standard transom; 122 N·m (90 lb-ft) metal lift plates or setback brackets.
Spark Plug — Inspect / Replace
- Remove coils; remove plugs (14 mm deep socket). Inspect insulator/electrodes; replace if worn/damaged. Precious-metal wear surface must be visible.
- Gap to 0.9 mm (0.035 in) using feeler/pin gauge only (never wedge-type); avoid prying on center electrode.
- Saltwater: apply anti-seize to threads only. Install finger-tight then ¼-turn, or torque to 20 N·m (177 lb-in).
Cooling System Water Strainer — Inspect
- Located at top of exhaust manifold. Remove sprayer/exhaust outlet hoses and clamps; remove two screws and lift cap/strainer.
- Clean debris/mineral deposits; replace if damaged. Refit cap with two screws torqued to 10 N·m (88.5 lb-in); install new Oetiker clamps 19.8 mm and 34.6 mm on hoses.
Propeller — Remove / Install
Removal
- Neutral; block prop; remove nut(s) and slide prop straight off. If seized, have a dealer remove it.
Installation — Revolution X® (Verado 350/400 require Flo-Torq X® hub)
- Apply Extreme Grease to all splined/threaded/tapered surfaces (prop shaft, thrust hub, nut, hub).
- Insert thrust washer into prop; install hub into prop; fit assembly to shaft.
- Fit flat washer and locknut; tighten to specified torque per manual.
Installation — Heavy-Duty (31.75 mm/1.25″ shaft)
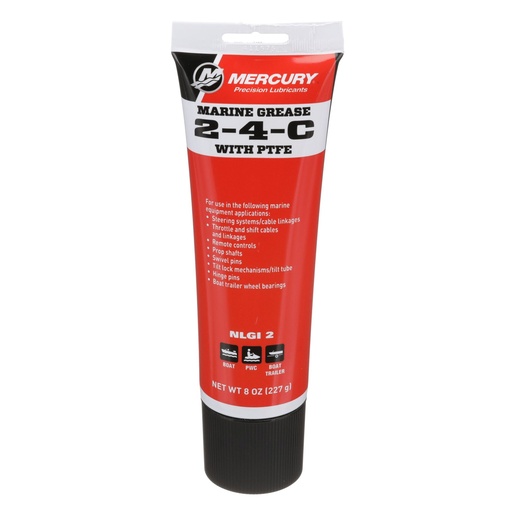
- Apply 2-4-C with PTFE to machined pilot diameter of HD hub; install HD hub into prop (may require light taps).
- Apply 2-4-C with PTFE to prop-shaft splines; install prop/hub, then washer.
- Tighten 0.75-16 brass hex nut to 115.2 N·m (85 lb-ft); install locknut and tighten to 115.2 N·m (85 lb-ft).
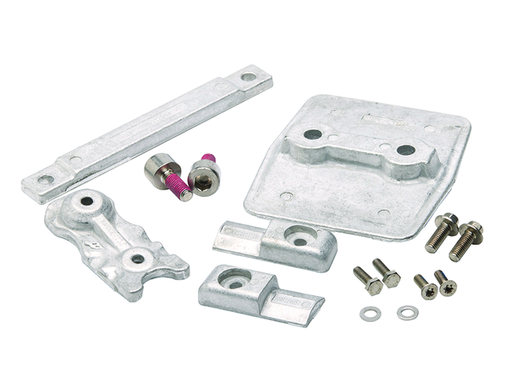
Corrosion-Control Anodes
- Inspect regularly (more often in saltwater). Replace before fully consumed. Do not paint or coat anodes.
- Common locations: underside of anti-ventilation plate, bottom of transom bracket & trim components.
Cleaning & Care Notes
Service Precaution & Disclaimer
Attention: The service guidance on this page is intended for individuals with appropriate mechanical experience, tools, and a solid understanding of marine and engine safety. Mercury Marine recommends that certain tasks-especially those involving internal engine components-be performed only by a qualified marine technician or authorised Mercury dealer.
All procedures provided here are for informational purposes only and are supplied "as is", without any guarantee of completeness, accuracy, or suitability. Incorrect tools, settings, or unsuitable techniques can lead to serious injury, vessel damage, or mechanical failure-particularly when working on fuel systems, lubrication, cooling, or electrical components. It is your responsibility to ensure safety and competence before attempting any service.
By proceeding, you assume all liability, and we shall not be held responsible for any adverse outcomes, including equipment damage, personal injury, or financial loss.